You just bought a new ultrasonic welder…What now?
You just bought a full equiped ultrasonic welder. What should we do to keep it efficient in the long term? In order to avoid saying “If only I had known before…”, here are some tips and instructions for the correct use and maintenance of the ultrasonic welder tools.
Vibration group
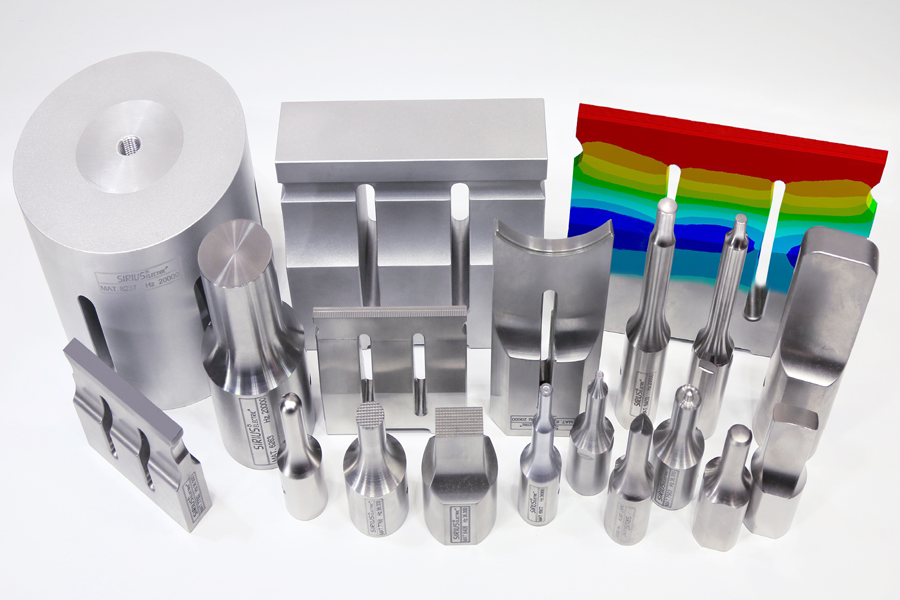
The equipment of an ultrasonic welder is composed of the vibration group (which consists of a converter, a booster and a sonotrode) and a holding fixture. Sirius Electric’s vibration group is made of a series of components designed with selected materials and sized by modern systems like 3D CAD or FEM calculation.
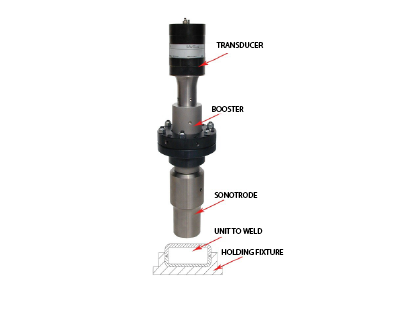
The converter is fully equipped with piezoelectric ceramics completed with connecting cables. A piezoelectric converter is composed of piezoelectric ceramics which is able to transform the variation of electric field in mechanical energy from vibrationby receiving electrical power with ultrasonic frequency between 20 and 36 kHz.
A booster, composed of an amplifier and a seal, which allows the mounting on a pneumatic press. The amplifier aims to adapt the outgoing vibration amplitude value of the converter to the sonotrode and the material to weld.
The welder also comes with a proper amplifier according to the specific problem. Keep in mind that it’s necessary to provide the welder manufacturer at least 30 units ready to be welded by ultrasounds.
As we can notice, managing the ultrasonic welder equipment correctly is crucial, as we can avoid machine-down times and production wastes, breaks, damages and costs to fix the vibration group:
TIP No. 1: All components of the vibration group described shouldn’t be modified, pierced or have material removals/additions. They need to be replaced by original components only.
TIP No.2: The non-compliance with these conditions may bring to production problems or welder breakdown. The usage of improper sonotrodes or equipment (i.e badly designed, broken or excessively amplified can really damage the welding stack, thus canceling any form of current warranty.
TIP No.3: The amplifier is put together with great care, so it’s important not to disjoint it.
Sonotrode
The sonotrode is the final tool of a welder and it aims to transmit the vibration to the unit to assemble. It carries out the following functions:
- transmission of the vibrational energy
- transmission of the press force
- transmission of amplitude
- shaping during the plastic deformation
The sonotrode has a complex level of technology, which has to keep on transmitting the vibration to the unit over the entire surface:
- It is subjected to very high mechanical stress with ultrasonic frequencies between 20 and 36 kHz.
- The mechanical vibration is expressed in micron peak-peak and it is between 10 and 100 micron depending on the application.
- It has to be done according to the geometry of the unit to weld.
- It has to resist wear and tear in presence of particular materials (PVC, metal in the insertions, acetalic, charged resins FV).
For these reasons, it has not to be modified, drilled, tapped, asported, removed or added material, screwed of new pieces without manufacturer’s authorization.
TIP No. 4: When ordering new sonotrodes, please be aware to indicate the type of welder but especially the type of the existing amplifier in order to reuse it where possible. If the new sonotrode doesn’t fit the available amplifier, it’s necessary to buy a proper one.
TIP No. 5: For an optimal welding, it’s not recommended the use of a large sonotrode. The vibration surface shall be as uniform as possible. So, in case of big-sized pieces, it’s suggested to use many vibration groups.
HOW TO SUBSTITUTE AND SETTLE A SONOTRODE
- Loosen the sonotrode only by suitable keys.
- Unscrew the sonotrode, slowly and carefully, avoiding damaging it with impacts on metal parts, especially on the welder surface.
- Completely unscrew the coupling screw by removing it from the sonotrode.
- Clean with compressed air the threaded hole of the sonotrode and store the sonotrode away from shocks, dust and damage.
- Before mounting the new tube, provide for:
- Clean the threaded holes of the sonotrode, amplifier and screw with compressed air.
- Lightly oil the above floors with light oil (speed 6).
- Check the perfect flatness between the amplifier/sonotrode contact surfaces.
Tip No. 6: Do not use sandpaper, metal objects, files. If the plans are very encrusted or otherwise no longer perfectly smooth, they must be restored by fine grinding.
- Tighten the screw completely into the sonotrode. The screw must penetrate easily without the help of pliers, clamps, etc. etc…
- Screw the sonotrode on the amplifier to the stop. The screwing must be easy without the use of keys or levers.
- Lock the sonotrode and lock it exclusively via key.
- Ensure the correct orientation of the sonotrode.
- Adjust the plan of the sonotrode, acting on the self-locking nuts of the ring.
Holding fixture (positioning plate)
Lastly, we have the hold fixture. It is a guide with the function of workpiece carrier. It plays a very relevant role throughout the welding phase. In general, it is used to contain the lower half of the piece to be welded. The holding fixture is placed at the base of the welder in a stable way.
How to order new equipment components
- PIEZOELECTRIC CONVERTER: Indicate the diameter as well as the model and serial number of the machine on which it is mounted.
- AMPLIFIER: Indicate the number printed on the ring and the dimensions of the two diameters
- SONOTRODE: Indicate the serial number printed above.